
Introduction
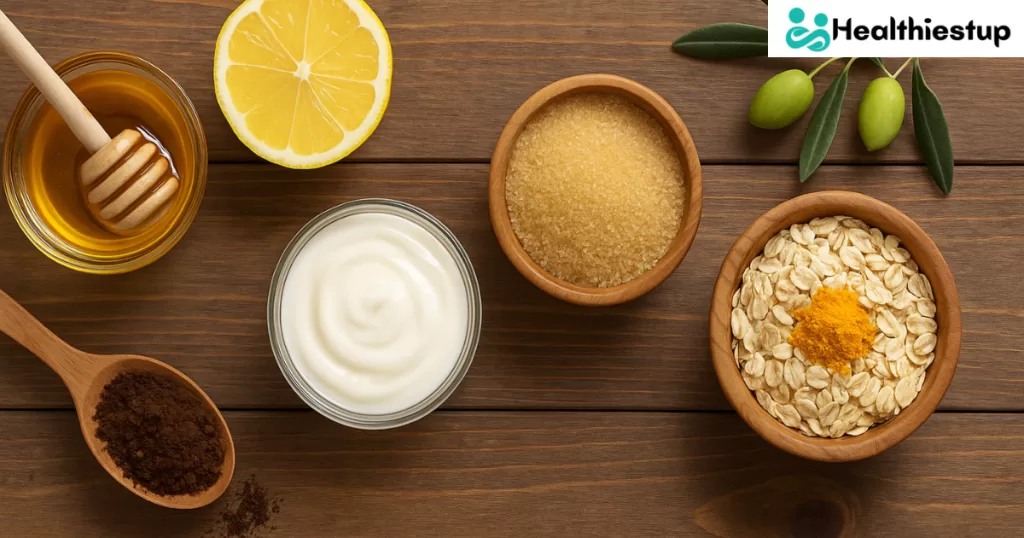
Kitchen Ingredients: In a world overflowing with beauty products and expensive skincare treatments, the most powerful remedies often come from the place we least expect our very own kitchens. That’s right! You don’t need to splurge on high-end face scrubs when nature has blessed us with ingredients that are not just effective but incredibly gentle on the skin. If you’re tired of chemical-laden skincare and looking for a radiant, natural glow, it’s time to embrace the magic of homemade scrubs.
In this guide, we’re diving deep into six everyday kitchen ingredients that work wonders for exfoliating, brightening, and rejuvenating your skin. Not only will your skin thank you, but your wallet will too. Let’s explore how to turn your pantry staples into potent beauty elixirs.
1. Honey – The Golden Nectar for Glowing Skin
Kitchen Ingredients: Honey is a timeless beauty staple used for centuries. With its natural humectant properties, it draws moisture into the skin while offering antibacterial benefits that help combat acne and breakouts. But what makes it a star in DIY scrubs?
Benefits of Honey in Face Scrubs
-
Deeply moisturizes and softens the skin
-
Kills acne-causing bacteria
-
Boosts skin cell regeneration
-
Heals scars and soothes irritation
When used in a scrub, honey provides a smooth base that balances the exfoliating particles, ensuring your skin doesn’t feel stripped.
How to Use:
-
Mix 1 tablespoon of honey with 1 tablespoon of finely ground oats or sugar.
-
Apply the mixture in circular motions.
-
Leave it on for 10 minutes and rinse off with warm water.
It’s ideal for dry, sensitive, or acne-prone skin and adds an instant glow post-use.
2. Coffee Grounds – Wake Up Your Skin
Kitchen Ingredients: Coffee isn’t just your morning lifesaver it’s also your skin’s best friend. The caffeine content helps stimulate blood flow and reduce the appearance of cellulite, puffiness, and under-eye circles. Its coarse texture makes it an excellent natural exfoliator.
Why Coffee Grounds Rock:
-
Boost circulation for a natural glow
-
Reduce puffiness and inflammation
-
Tighten skin and minimize cellulite
-
Gently remove dead skin cells
Coffee grounds help to slough away dull, dry skin and invigorate tired complexions, leaving you looking more awake.
How to Use:
-
Combine 1 tablespoon of coffee grounds with 1 tablespoon of yogurt or coconut oil.
-
Massage gently onto your face in upward circular motions.
-
Leave on for 5-7 minutes before rinsing off.
Not only does this scrub awaken your senses, but it also leaves your skin energized and refreshed.
3. Oatmeal – The Sensitive Skin Savior
Kitchen Ingredients: If your skin throws tantrums over every new product, oatmeal might be your best bet. It’s hypoallergenic, soothing, and perfect for calming inflammation or redness. Oatmeal scrubs are gentle enough for daily use and pack a hydrating punch.
What Oatmeal Brings to the Table:
-
Soothes irritated and inflamed skin
-
Provides mild exfoliation
-
Balances pH levels naturally
-
Reduces itchiness and dryness
Oatmeal also contains saponins natural cleansers that help remove dirt and oil without drying your skin.
How to Use:
-
Grind 2 tablespoons of oats into a fine powder.
-
Mix with 1 tablespoon of milk or honey.
-
Apply and gently scrub, then let it sit for 10 minutes.
It’s particularly good for those battling eczema, rosacea, or dry skin flares.
4. Turmeric – The Brightening Powerhouse
Kitchen Ingredients: Turmeric, often referred to as “liquid gold” in skincare, is loaded with curcumin, an antioxidant that helps reduce dark spots, pigmentation, and acne scars. While too much can stain your skin yellow, a small pinch can work magic in a scrub.
Why Turmeric Deserves the Hype:
-
Reduces hyperpigmentation and dark spots
-
Fights acne-causing bacteria
-
Brightens dull, tired skin
-
Combats free radicals with antioxidant properties
Just a little turmeric can go a long way in enhancing your skin’s radiance.
How to Use:
-
Mix a pinch of turmeric with 1 tablespoon of yogurt and 1 teaspoon of chickpea flour.
-
Apply the paste evenly to your face.
-
Let it dry for 10 minutes, then scrub off gently in circular motions.
Use it 1-2 times a week for visible brightness without overdoing it.
5. Sugar – The Classic Exfoliator
Kitchen Ingredients: Sugar might get a bad rep in diets, but it’s a skincare hero when used right. Both brown and white sugar are excellent exfoliants that help buff away dead skin cells and promote healthy skin regeneration.
Why Sugar Scrubs Work So Well:
-
Provides thorough exfoliation without harshness
-
Melts easily into the skin for smoother texture
-
Promotes cell turnover and softens rough patches
-
Improves circulation and stimulates collagen production
Sugar is suitable for most skin types, especially when paired with moisturizing ingredients like oils or honey.
How to Use:
-
Combine 1 tablespoon of sugar with 1 tablespoon of olive oil or coconut oil.
-
Gently rub onto your skin for about 2-3 minutes.
-
Rinse with lukewarm water and pat dry.
This scrub leaves your skin smooth, glowing, and prepped for further skincare.
6. Yogurt – The Natural Skin Softener and Cleanser
Kitchen Ingredients: Yogurt isn’t just a delicious snack it’s a skincare powerhouse that contains lactic acid, which helps in gently dissolving dead skin cells. It also hydrates, soothes, and nourishes your skin while balancing your natural microbiome.
Skin Benefits of Yogurt:
-
Exfoliates gently with natural lactic acid
-
Soothes inflammation and redness
-
Tightens pores and brightens the skin
-
Moisturizes and restores skin elasticity
Yogurt’s creamy texture makes it an excellent base for face scrubs, especially when paired with exfoliants like oats or coffee.
How to Use:
-
Mix 2 tablespoons of plain yogurt with 1 tablespoon of fine oatmeal or crushed almonds.
-
Apply evenly to your face, scrubbing gently in circles.
-
Leave it on for 10-15 minutes before rinsing.
Perfect for a quick skin pick-me-up, this combo leaves your face feeling baby-soft and rejuvenated.
The Perfect DIY Face Scrub Recipe (Combining Ingredients)
Kitchen Ingredients: Want to create a miracle potion from your kitchen shelf? Combine a few of these power-packed ingredients for a balanced scrub that exfoliates, hydrates, and brightens all at once.
All-In-One DIY Face Scrub:
-
1 tbsp oatmeal (finely ground)
-
1 tsp honey
-
½ tsp turmeric
-
1 tbsp yogurt
-
1 tsp brown sugar
-
½ tsp coffee grounds (optional)
Mix well into a paste. Apply in circular motions. Let it sit for 10 minutes. Rinse with warm water and pat dry.
This scrub is ideal for dull, dry, or combination skin and gives you that radiant, just-stepped-out-of-the-spa glow.
Best Practices When Using DIY Face Scrubs
Kitchen Ingredients: Using natural ingredients is a win, but doing it right is crucial for lasting results. Over-scrubbing or using the wrong combo can do more harm than good. Here’s what to keep in mind:
Tips to Maximize Results:
-
Scrub only 2-3 times a week to prevent microtears and over-exfoliation.
-
Always patch test new ingredients to avoid allergic reactions.
-
Use fresh ingredients—don’t save scrubs longer than a week.
-
Follow up with a toner and moisturizer to lock in hydration.
-
Avoid applying scrubs on broken or inflamed skin.
DIY face scrubs are gentle but effective when used with care. Listening to your skin is key.
Who Should Avoid DIY Face Scrubs?
Kitchen Ingredients: While natural scrubs can work wonders, not all skin types react the same. If you have extremely sensitive or compromised skin, consult a dermatologist before trying home remedies.
Avoid DIY Scrubs If You:
-
Have active acne or cystic breakouts
-
Have skin conditions like eczema, psoriasis, or rosacea
-
Just underwent a cosmetic procedure (chemical peels, micro needling, etc.)
-
Experience frequent skin allergies or reactions
If you fall into these categories, stick to dermatologist-recommended products to avoid flare-ups.
Why Go Natural? Benefits of Kitchen-Based Skincare
Kitchen Ingredients: So, why should you trust your skincare to ingredients meant for your stomach? Because they’re effective, affordable, and free from harsh chemicals.
Top Benefits of Kitchen Ingredients:
-
Zero preservatives or artificial additives
-
Budget-friendly beauty fix
-
Gentle on your skin and the environment
-
Easily customizable to suit your needs
-
No synthetic fragrances or parabens
Kitchen Ingredients: When you use what nature gives you, your skin gets to heal and glow naturally without side effects or harsh aftereffects.
Skin Types and Matching Ingredients: What’s Right for You?
Kitchen Ingredients: Your skin type plays a big role in choosing the right kitchen ingredients for your DIY face scrub. Not all natural remedies work universally. Here’s how to tailor your scrubs to your skin’s unique needs.
For Oily and Acne-Prone Skin:
-
Best ingredients: Honey, turmeric, yogurt, coffee grounds
-
Why: These ingredients help balance oil production, reduce inflammation, and kill acne-causing bacteria.
For Dry and Flaky Skin:
-
Best ingredients: Honey, oats, yogurt, sugar, olive oil
-
Why: These offer intense hydration and gentle exfoliation without stripping away natural oils.
For Combination Skin:
-
Best ingredients: Oats, honey, turmeric, yogurt
-
Why: These provide balance—hydrating dry patches while managing oil in the T-zone.
For Sensitive Skin:
-
Best ingredients: Oats, honey, yogurt
-
Why: These are soothing and non-abrasive, reducing redness and irritation.
Customize your face scrub with these combinations and your skin will love you for it.
How Often Should You Use Face Scrubs?
Kitchen Ingredients: This is one of the most common skincare questions. While exfoliating is key to removing dead cells and boosting glow, overdoing it can cause redness and dryness.
Recommended Usage by Skin Type:
-
Oily skin: 2-3 times a week
-
Dry skin: Once or twice a week
-
Sensitive skin: Once a week
-
Combination skin: 1-2 times a week
Always listen to your skin. If it feels irritated or dry, pull back and give it time to recover.
Mistakes to Avoid When Using DIY Scrubs
Kitchen Ingredients: Natural doesn’t always mean foolproof. Many people unintentionally harm their skin by using harsh ingredients or incorrect methods.
Top DIY Scrub Mistakes:
-
Using coarse granules like sea salt or raw sugar on the face
-
Applying pressure while scrubbing
-
Skipping a moisturizer post-exfoliation
-
Not cleaning your hands or utensils before making the scrub
-
Using expired or old ingredients
Remember, your skin is delicate—treat it with kindness.
Storing and Preserving Your Homemade Scrubs
Kitchen Ingredients: Want to save time and make your scrub in bulk? Go ahead, but do it right.
Storage Tips:
-
Use airtight containers to prevent contamination.
-
Store in the fridge to prolong freshness.
-
Avoid water contamination—always scoop with a clean spoon.
-
Make small batches—use within 5-7 days.
Label your jars with the date to keep track. Natural products lack preservatives, so they spoil faster.
Conclusion
Kitchen Ingredients: Your journey to radiant, glowing skin doesn’t have to involve expensive serums or chemical peels. Sometimes, the answer is right in your kitchen. Whether it’s the humectant magic of honey, the exfoliating power of coffee, or the calming touch of oats—each of these ingredients brings unique benefits to the table.
By customizing these ingredients based on your skin type and using them correctly, you can create face scrubs that not only exfoliate but also nourish and heal your skin. So, next time you think of tossing out those extra oats or leftover yogurt, think again—they might just be your next skincare superhero.
Glowing skin is just a scrub away—naturally, affordably, and effectively.
FAQs
Q1. Can I use these DIY scrubs every day?
No, it’s best to exfoliate 2-3 times a week depending on your skin type to avoid irritation and over-exfoliation.
Q2. Which ingredient is best for acne-prone skin?
Honey and turmeric are excellent for acne-prone skin due to their antibacterial and anti-inflammatory properties.
Q3. How long should I leave the scrub on my face?
5-10 minutes is ideal. This allows the nutrients to absorb into the skin before rinsing.
Q4. Can I use DIY scrubs if I have eczema or rosacea?
It’s best to consult a dermatologist first. Some ingredients may soothe your skin, but others might trigger a reaction.
Q5. What time of day should I exfoliate?
Evening is ideal as your skin repairs itself overnight, and it gives time for post-exfoliation redness to calm.

