
Introduction
Why Full Body Workouts Are Ideal for Beginners
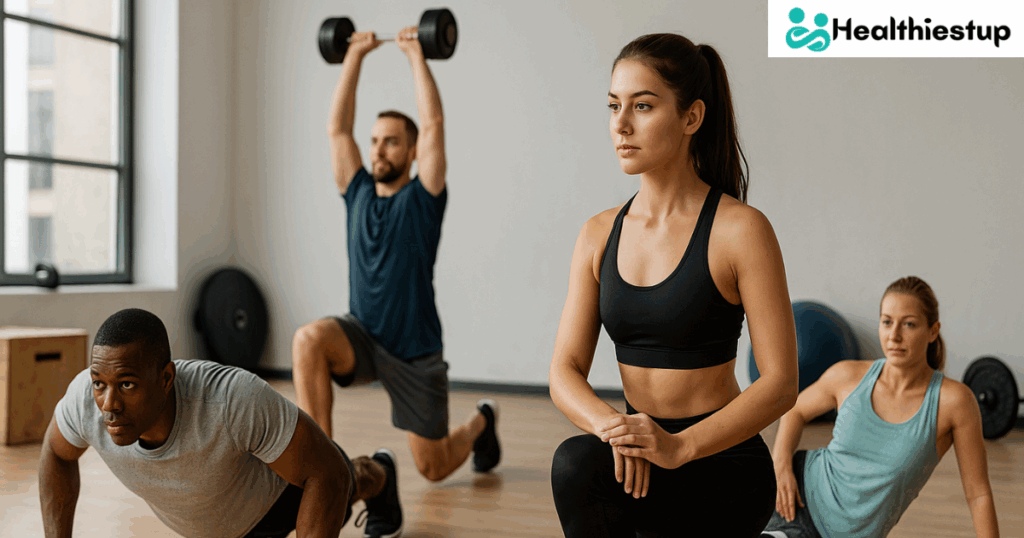
Full Body Workouts: Getting started on a fitness program may be both thrilling and daunting. There are countless exercises, routines, and programs available online, which can easily leave beginners feeling confused about where to start. But here’s the good news when in doubt, full body workouts are your best bet.
Why? Because full body workouts target all the major muscle groups in a single session, helping you build balanced strength and coordination. For beginners, this is particularly important. Rather than isolating individual muscles like in traditional bodybuilding splits, full body workouts teach your body to move efficiently and synergistically. That’s the foundation of real-world functional strength.
When you’re just starting out, your body adapts quickly. Full body workouts allow you to maximize those early adaptations by hitting each muscle group multiple times a week. They improve your cardiovascular health, enhance mobility, and even accelerate fat loss because of the metabolic demand placed on your body.
Perhaps best of all, they’re simple. You don’t need fancy machines or a fully stocked gym. With just your body weight and a pair of dumbbells, you can develop serious strength and stamina right from your living room.
Benefits of Minimal Equipment Routines
Minimal equipment routines are an absolute game-changer for beginners. Not everyone has access to a gym, but that doesn’t mean your fitness journey should be put on hold. You can train effectively using a combination of bodyweight movements and light dumbbells and that’s all you really need to start seeing improvements in strength, mobility, and endurance.
These workouts are accessible and flexible. Whether you’re at home, in a park, or traveling, you can get a full body workouts done without relying on bulky machines. Training with minimal equipment also encourages better form and body awareness, two essential components of injury prevention.
For beginners, starting with minimal equipment means a lower risk of strain or overtraining. You’ll be more focused on technique and control rather than heavy lifting, which helps in building a strong, stable base for future progress. Plus, it saves money and time no commute to the gym or monthly fees. Just grab your dumbbells, clear a space, and you’re ready to move.
Foundational Lower Body Strengthening Exercises
Lunges: Mastering Balance and Leg Power
Full Body Workouts: Lunges are an excellent entry point for anyone new to strength training. They’re a compound movement, which means they work multiple muscle groups at once—mainly your quads, glutes, hamstrings, and calves. But what makes lunges particularly special is that they also improve balance, coordination, and functional movement patterns.
Unlike squats, lunges work each leg independently. This helps to correct muscular imbalances and improve unilateral strength, which is essential for daily activities like walking, climbing stairs, and carrying groceries. If you’ve ever felt wobbly trying to step up onto a curb, lunges are the fix you’ve been looking for.
How to Perform Lunges:
-
Stand upright with feet hip-width apart and arms relaxed by your sides.
-
Position your right foot in front of you and lower your hips till your right thigh is parallel to the ground.
-
Keep your right knee above the ankle—never let it go beyond your toes.
- To get back to where you started, use your right foot.
-
Repeat on the left side.
Prescription: Assign each leg three sets of ten repetitions. As you get stronger, increase the reps or hold dumbbells for added resistance.
Tips for Beginners:
-
Maintain a strong core and an erect posture throughout the activity.
-
If you struggle with balance, perform reverse lunges instead.
-
Use a mirror to check the alignment of your knees.
Squats: The King of Compound Movements
Full Body Workouts: Squats have earned their reputation as the “king” of lower body exercises for a reason. This foundational movement works nearly every muscle in your lower half including the glutes, hamstrings, quadriceps, calves, and even your core. What makes squats particularly powerful for beginners is their ability to teach proper body mechanics and build muscular endurance in a safe, scalable way.
When done correctly, squats enhance hip mobility, strengthen the lower back, and even improve your posture. You’re basically doing a squat whether you’re sitting, lifting a box, or climbing stairs. Mastering this movement is crucial for functional strength and injury prevention.
How to Perform Bodyweight Squats:
-
Stand with your feet just wider than shoulder width apart.
-
Start by bending your knees, pushing your hips back, and engaging your core.
- Lower your torso, keeping your thighs parallel to the floor. Maintain an upright chest and flat back.
-
Extend your arms in front for balance.
- Lower your torso, keeping your legs parallel to the ground. Maintain a straight chest and level back.
Prescription: Aim for 3 sets of 20 reps. Rest for 30–60 seconds between sets.
Common Mistakes to Avoid:
-
Letting your knees cave inward—keep them aligned over your toes.
-
Rounding your back—engage your core and keep your spine neutral.
-
Not going low enough—aim for parallel thighs at a minimum.
As you progress, you can transition into weighted squats using dumbbells or kettlebells. But for now, focus on mastering the mechanics with bodyweight to build a solid base.
Essential Upper Body Movements for Beginners
Push-Ups: Full-Body Activation Without Equipment
Full Body Workouts: One of the easiest and most efficient upper body exercises is the push-up. They require no equipment, can be done anywhere, and target multiple muscle groups including the chest, shoulders, triceps, and core. For beginners, mastering the push-up provides a foundation for overall upper body strength and bodyweight control.
When executed properly, push-ups are more than just a chest exercise. They engage your entire kinetic chain—meaning your legs, glutes, abs, and even your lower back get involved. That’s why push-ups are often referred to as a moving plank; they demand total body tension and control.
How to Perform a Standard Push-Up:
- To begin, assume a high plank position with your hands slightly wider than shoulder-width apart.
-
Keep your body in a straight line from head to heels no sagging hips or elevated butt.
-
Bend your elbows till your chest almost touches the floor to lower your body.
-
Keep your elbows tucked close to your body (about a 45-degree angle from your sides).
-
To get back to where you were before, push through your palms.
Prescription: Maintain flawless form while performing three sets of as many reps as feasible (AMRAP).
Beginner Modifications:
-
Knee Push-Ups: Lower your knees to the floor while keeping your core engaged.
-
Wall Push-Ups: Stand and push against a wall to develop upper body strength in the early stages.
-
Incline Push-Ups: Place your hands on a sturdy bench or countertop to reduce the load.
Form Tips:
-
Engage your glutes and core to prevent your hips from dipping.
-
Avoid flaring your elbows too far out this puts strain on your shoulders.
-
Exhale as you raise yourself, and then inhale as you lower yourself.
Push-ups also offer endless progressions. As you improve, you can explore more advanced variations like decline push-ups, archer push-ups, or diamond push-ups.
Standing Overhead Dumbbell Press
Full Body Workouts: The standing overhead dumbbell press is a staple for upper body development, particularly the shoulders, upper traps, and triceps. Because the movement is performed standing, it also forces your core and lower body to engage for balance and stability, turning it into a full-body effort.
This makes the overhead press an ideal choice for beginners seeking efficient, compound exercises that deliver maximum value. Not only does it help build strength, but it also enhances posture by counteracting the forward-shoulder slump that’s common in today’s desk-bound world.
How to Perform the Dumbbell Overhead Press:
-
Stand tall with your feet shoulder-width apart. In each hand, hold a dumbbell at shoulder height with the palms facing up.
-
Brace your core and glutes to stabilize your spine.
-
Raise both dumbbells above your head until your arms reach their maximum length. Maintain your biceps near your ears.
-
Return the dumbbells to the beginning position with caution after a little pause at the peak.
Prescription: 3 sets of 12 repetitions. Choose a weight that will challenge you while allowing you to keep proper form.
Beginner Form Tips:
-
Avoid arching your lower back—keep your rib cage tucked and core engaged.
-
Use a staggered stance (one foot slightly in front of the other) for added balance.
-
If using both arms simultaneously is difficult, try a single-arm press for better control.
Overhead pressing builds strength that translates into everyday actions—like lifting items onto a shelf or playing catch with your kids. It’s foundational and functional.
Dumbbell Rows: Building a Stronger Back
Full Body Workouts: One of the best exercises for developing your back is the dumbbell row. It targets key muscles like the latissimus dorsi, rhomboids, traps, and biceps. For beginners, this movement is crucial for building pulling strength and promoting better posture especially important if you spend long hours sitting.
Dumbbell rows are a unilateral movement, meaning each side of your body works independently. This helps address strength imbalances and enhances muscular coordination, both of which reduce injury risk.
How to Perform Dumbbell Rows:
- Hold a dumbbell with the palms pointing inward in each hand.
-
Hinge at the hips to bring your body down to a 45-degree angle. Make sure your spine is neutral and your core is supported.
-
Let your arms hang straight down, then pull one dumbbell toward your torso by bending your elbow.
-
At the apex, squeeze your shoulder blade, and then gradually reduce the weight.
-
Alternate arms or perform both sides separately.
Prescription: 10 reps per arm in 3 sets.
Tips for Execution:
-
When pulling, keep your elbow near your side.
-
Don’t round your back engage your core throughout.
-
Use controlled, deliberate movements to avoid momentum.
If you’re training at home and only have one dumbbell, you can support your non-working arm on a bench or chair for added stability. The dumbbell row teaches you how to activate your back muscles intentionally something many beginners struggle with.
Core and Posterior Chain Development
Glute Bridges: Building Foundational Posterior Strength
Full Body Workouts: The glute bridge is more than just a warm-up exercise it’s a potent strength move that targets the glutes, hamstrings, and lower back. It’s especially beneficial for beginners because it can be performed without equipment, yet still delivers significant results in strengthening the posterior chain.
Strong glutes are vital for hip stability, lower back support, and efficient movement. Your hips are the source of power whether you’re lifting, running, or strolling. Poor movement patterns and an elevated risk of injury can result from neglecting these muscles.
How to Perform a Glute Bridge:
-
Place your feet flat on the floor, hip-width apart, and bend your knees while lying on your back.
-
Put your arms, palms down, at your sides.
-
To raise your hips toward the ceiling, contract your core and push through your heels.
-
At the top, your body should form a straight line from shoulders to knees.
-
Hold for one or two seconds after squeezing your glutes, then release the tension.
Prescription: 3 sets of 10–12 reps.
Progressions:
-
Single-Leg Glute Bridge: Lift one leg off the floor to increase difficulty.
-
Weighted Glute Bridge: Place a dumbbell or barbell across your hips for added resistance.
Common Mistakes:
-
Overextending the lower back keep the core tight and movement controlled.
-
To properly activate your glutes, push with your toes and drive into your heels.
This movement builds a solid base of strength and is perfect for counteracting the effects of sedentary lifestyles.
|Also Read: 20+ Best No Equipment Workouts You Can Do Anywhere
Side Planks: Improving Lateral Stability
Full Body Workouts: While many core exercises focus on the front (like crunches), side planks target the obliques—muscles that help with rotation, lateral movement, and stability. Side planks are isometric, meaning you hold the position rather than move through reps. This trains your muscles to stabilize and support your body, which is essential for functional movement.
They also work the glutes, shoulders, and transverse abdominis, the deep core muscle that acts like a natural weight belt for your spine.
How to Perform a Side Plank:
- Stretch and stack your legs while lying on your right side.
-
Place your right elbow directly beneath your shoulder.
- Raise your hips off the floor so that your head and feet are in a straight line.
-
Hold for 20–30 seconds, then switch sides.
Prescription: 3 sets per side. Increase duration as you build strength.
Beginner Modifications:
-
Drop your bottom knee to the ground for additional support.
-
Hold the plank for shorter intervals and gradually increase.
Tips for Maximum Benefit:
-
Keep your body in one straight line avoid leaning forward or backward.
-
In addition to your core, work your thighs and glutes.
Side planks are not glamorous, but they are incredibly effective in building real-world strength and injury resistance.
Total Core and Conditioning Finishers
High Planks: Core Stability with Full-Body Engagement
Full Body Workouts: High planks are often underestimated due to their simplicity, but they are a powerhouse for building total-body tension and endurance. For beginners, mastering the high plank helps develop core strength without the spinal compression risk associated with crunches or sit-ups.
When held correctly, a high plank engages not only your abs but also your shoulders, arms, glutes, and even your quads. It’s essentially a static push-up position that demands balance, strength, and concentration.
How to Perform a High Plank:
-
Place your hands directly beneath your shoulders to begin in the push-up posture.
- From head to heels, maintain a straight body alignment.
-
To keep the position, use your legs, glutes, and core.
-
Look slightly forward to keep a neutral neck position.
Prescription: Start with 30-second holds for 2–3 sets, gradually increasing the time as your endurance improves.
Tips for Maintaining Form:
- Keep your hips from sagging or piking up.
-
Keep your elbows slightly soft—not locked out.
-
Avoid shifting your weight side to side.
Why High Planks Matter for Beginners:
-
Strengthens deep core muscles.
-
Builds shoulder and wrist stability.
-
Enhances overall body awareness.
You can also modify the high plank to a forearm plank to reduce wrist pressure or progress it to dynamic variations like shoulder taps, plank jacks, or mountain climbers for an added cardio boost.
Burpees: The Ultimate Bodyweight Conditioning Exercise
Full Body Workouts: Burpees are arguably one of the most effective conditioning tools available and they don’t require any equipment. This explosive, high-intensity movement combines strength, cardio, and agility, making it ideal for boosting heart rate and burning calories.
For beginners, burpees may seem intimidating at first. But by mastering the basic form and progressing at your own pace, they can become a vital tool in your training arsenal.
How to Perform a Standard Burpee:
-
Place your hands directly beneath your shoulders to begin in the push-up posture.
- From head to heels, maintain a straight body alignment.
3. To keep the position, use your legs, glutes, and core.
4. Look slightly forward to keep a neutral neck position.
Prescription: 3 sets of 10 repetitions for beginners. Adjust reps or intensity as needed.
Beginner-Friendly Modifications:
-
Eliminate the push-up or jump to reduce impact.
-
Step back instead of jumping to ease joint stress.
Benefits of Burpees:
-
Increases cardiovascular endurance.
-
Builds total-body strength.
-
Enhances coordination and mental toughness.
Even doing 5–10 burpees at the end of your workout can provide a powerful metabolic finisher. As your conditioning improves, they can be incorporated into circuits or high-intensity interval training (HIIT) sessions.
Lower Body Strength and Control
Single-Leg Deadlifts: Balance, Strength, and Functionality
Full Body Workouts: The single-leg deadlift is an often overlooked exercise, but it offers tremendous benefits for balance, stability, and unilateral leg strength. It targets the glutes, hamstrings, calves, and core—all while challenging your coordination.
For beginners, mastering this movement improves neuromuscular control and builds strength evenly across both legs. It’s especially valuable for preventing muscular imbalances that could lead to injury.
How to Perform a Single-Leg Deadlift:
-
Stand upright with a dumbbell in one hand and a slight bend in both knees.
-
Shift your weight to your right leg.
- Stretch your left leg behind you and hinge at the hips.
-
Lower the dumbbell toward the ground, keeping your spine neutral and core braced.
-
Engage your glutes and drive into your heel to stand again.
Prescription: Perform 3 sets of 10–12 reps per leg.
Form Tips:
- Avoid opening up the hip of the lifted leg and maintain your hips straight to the floor.
-
Focus on a slow, controlled descent and return.
-
If you have trouble balancing, utilize a chair or wall for light support.
Single-leg deadlifts build real-world strength like picking something up while standing on one leg. They also help correct imbalances between limbs, leading to better athletic performance and injury prevention.
Cool-Down and Mobility Integration
Full Body Workouts: It’s important to give your body time to return to a resting state after your workout. A proper cool-down increases flexibility, lessens muscular soreness, and speeds up recovery. For beginners, this part of the session often gets skipped but it’s essential for long-term progress and injury prevention.
Suggested Cool-Down Routine (5–10 Minutes):
-
Child’s Pose (1 min): Stretches the hips and lower back.
-
Cat-Cow (1–2 mins): Mobilizes the spine and releases tension.
-
Standing Hamstring Stretch (1 min per leg): Loosens tight hamstrings.
-
Figure-Four Stretch (1 min per leg): Opens up the glutes and hips.
-
Shoulder Stretch (1 min per arm): Relieves shoulder tension after pressing movements.
Breathing and Mindfulness:
-
Deep, diaphragmatic breathing during the cool-down helps bring your heart rate down and promotes a calm state.
-
Use this time to mentally review your workout and set goals for your next session.
Remember, the way you finish your workout can be just as important as how you start it. Treat your body with care—it’ll reward you with progress and longevity.
Conclusion
Full Body Workouts: Embarking on a fitness journey doesn’t require fancy equipment or hours at the gym. As you’ve seen, these foundational full body workouts offer everything a beginner needs: strength, stability, balance, endurance, and most importantly confidence.
Whether you’re performing push-ups in your living room, dumbbell rows in your garage, or glute bridges before bed, the key is consistency. Start with the exercises that feel most manageable and progress at your own pace. Focus on form, not speed. Quality over quantity always wins.
Each of the 10 exercises we’ve covered plays a specific role in helping you build a stronger, healthier body. From activating large muscle groups with squats and deadlifts to refining your core strength with planks and side holds, this routine provides a full-spectrum approach to fitness.
As you proceed on your path, remember to:
-
Prioritize recovery and mobility.
-
Track your progress and celebrate small wins.
-
Stay patient and trust the process.
You just need to start; you don’t have to be flawless.
FAQs
Q1. How often should a beginner do this full body workouts?
Start with 2–3 sessions per week, with at least one rest day between. As you build endurance and strength, you can increase the frequency.
Q2. Can I lose weight with this routine?
Absolutely. Combined with proper nutrition and consistency, this routine can help you burn fat, gain muscle, and improve metabolic health.
Q3. What if I don’t have dumbbells?
You can use household items like water bottles, backpacks, or canned goods. Resistance bands are also a great alternative.
Q4. Should I stretch before or after the workout?
Do dynamic stretches before your workout to warm up and static stretches after to cool down and improve flexibility.
Q5. How long will it take to see results?
With consistent effort, most people start seeing noticeable changes in strength, energy levels, and muscle tone within 4–6 weeks.

